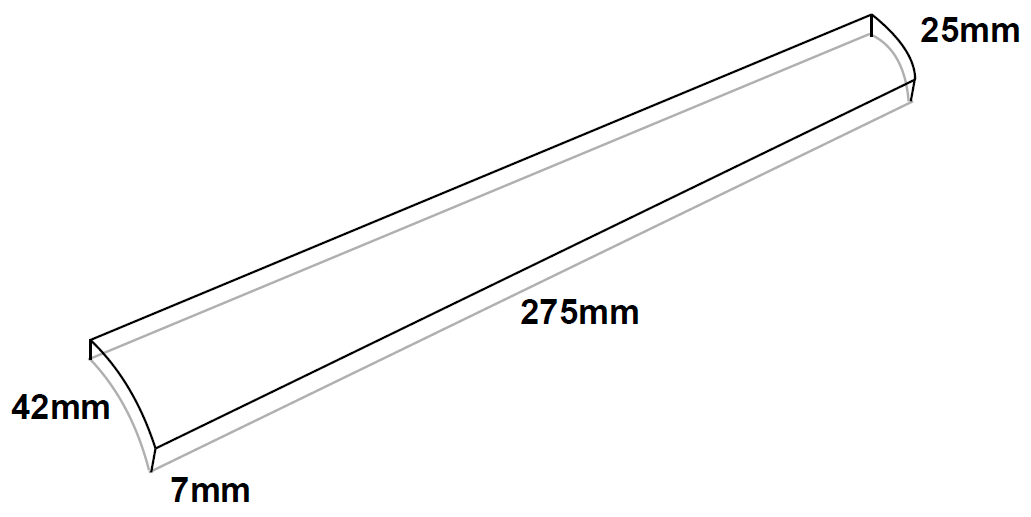
The fingerboard (or das Griffbrett oder Ebenholzgriffbrett in German, ie, the fingerboard or the ebony fingerboard in English).
The dimensions for a 4/4 violin, usually, are as follows:

For the back part of the neck, you should also carve it (or “hollowing the under side”) like so:

A skilled luthier might build a template to get that curvature right. Perusing the Internet, I often see people “using” this or products for sale, with minimal information on how to actually build one.
In other instances, the content is protected and restricted to subscribers. Sad.
That ends now.
Let’s design our fingerboard template. We will have to conjure the knowledge of Miss Geometry.
Kickstart this by drawing a circle with radius 420mm and then pick a chord of size 52mm.
For instance:

I don’t want to diminish your maths knowledge, but that’s one pretty easy drawing to make.
You can use any material for the template, of course, the usual recommendations apply, best are materials that don’t change their shape over time, like wood, so aluminium, cardboard, etc, are preferred.
In order to draw this the most exact way, what is the distance from the centre point of this circle to the beginning of the chord (d in the figure)?

Well, let’s go back to school for a moment. You will finally use what you’ve learned.
I know the radius (420mm).
I know the chord’s length (520mm), so half of this is 260mm.
I need to compute d. The Pythagorean Theorem tells us that:

And Google’s entry on Pythagorean Theorem (and solving for the ‘leg’) tells me that:

So, d = 329.84845mm or d = 330mm for simplification sake and that shall work just fine.
So, to find the location of the chord, one takes a ruler and from the circle’s centre point, measure 330mm and strike a chord.
That’s the final shape (don’t print this, make your own!):

Now you can build your own template!
Building my own template
Here’s it:

It has a bit more than 52mm on the top, but that’s not an issue at all. It’s made out of the end of a filler’s knife. Then I measured it and used a hacksaw to cut the piece, followed by a lot of filing to shape (the circular one).
The 42mm mark is what matters, that’s the size of the fingerboard on a 4/4 violin after all.

Checking against the bridge template now (and the draft measurements I’ve made to build and mark it):

I’m happy with this. Thanks for staying to the very end.
Final thoughts and tips
After working the fingerboard the last stage would be to do a final sanding using wet-dry sandpaper (600+ grit) and impregnate it with boiled linseed oil (BLO – read here safety recommendations), letting it absorb it (briefly, for some time) and then wiping off the surface.
This will allow the oil to function as a blanket against humidity and sweat, protecting it over time.