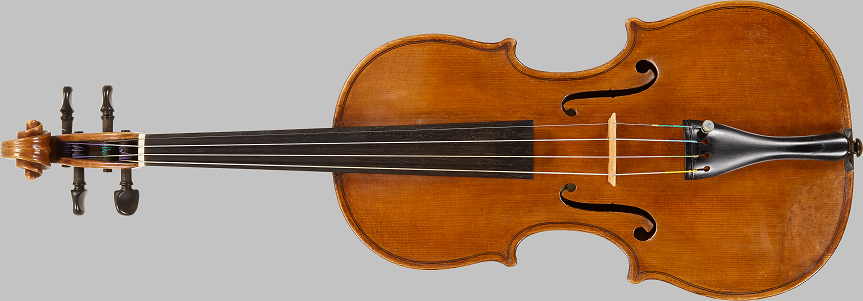
A violin has fundamentally 17 parts (if we count f-hole as a ‘part’, the four tuning pegs together, the garland – although it has four parts, and we don’t mention the four strings – not in the figure):

Here are all the parts:
- Tailpiece
- Fingerboard
- Nut
- Scroll (volute)
- Tuning pegs
- Neck
- Bridge
- Tail saddle
- Tail nut
- F-holes
- Belly (2 pieces)
- Purfling
- Bassbar
- Soundpost
- Garland: c-bouts, upper/lower bouts, sidestrips
- End button
- Back (2 pieces)
In German:

In Portuguese:

Interestingly, the soundpost in Portuguese was translated as “Alma” meaning “Soul” of the violin.
The bow has the following parts:

The end is subdivided in:

Bridge
The bridge has also some interesting nomenclature:

Nature-based components
A violin is basically composed of many organic materials in its construction.
For instance, the “Hair” used on the bow is made of actual horse hair: one could select hair out of Siberian, Mongolian, Manchurian, Polish, and also Argentinian horsehair. One could choose white or black colours.
Although modern strings are made of steel and plastic components, in the early days, they were made of animal guts, typically sheep intestines. There is a very nice video on YouTube detailing how it is made. To this day some violinists prefer to use animal gut.
Finally, as you know, to glue it all together, violin makers use animal glue, produced out of connective tissues, namely, bones, skin/hide, or sinew.
Notes on violin making: 19 basic steps?
Interestingly, one could ‘divide the labour’ on building a violin into the following tasks (order is not ‘written in stone’, of course):
- Work on the garland: blocks, c-bouts, upper/lower bouts, sidestrips
- Prepare and work on the back
- Glue the back on the finished garland
- Prepare and work on the belly
- Work on the purflings in back and belly
- Carve out the f-holes
- Glue the soundbar
- Brand it: add nametag 😉
- Finish the soundbox: glue top on garland+back
- Work on the neck (volute)
- Work on the fingerboard, glue it to the neck
- Glue neck to soundbox in proper angle
- Work on small parts: tail saddle, nut, carve out and adjust bridge
- Prepare tuning pegs
- Add rest of the parts: tailgut, tailpiece, endbutton
- Add and adjust soundpost
- Add strings
- Prepare bow
- Play it
That’s it.
Epilogue
A traditional violin in the early days was made out of (knot-free) wood and animals.
